

Last updated:
Grid Trading: When It Works and When It Doesn't
Grid trading is one of the most systematically satisfying strategies in retail investing and one of the most misapplied. It works in ranging markets. It fails in trending ones. Here's the framework for using it correctly.

Grid Trading: When It Works and When It Doesn't
Most traders who blow up on a grid strategy didn't misunderstand the mechanics.
They applied the right strategy to the wrong market conditions. The grid filled in one direction, opposing trades never triggered, and they found themselves holding a large position in a trending asset with no plan for how to exit it.
Grid trading is not a set-it-and-forget-it system. It's a systematic approach to a specific type of market environment. Get the environment wrong, and the system works against you just as efficiently as it works for you when you get it right.
Here's how to tell the difference.
What the Strategy Actually Is
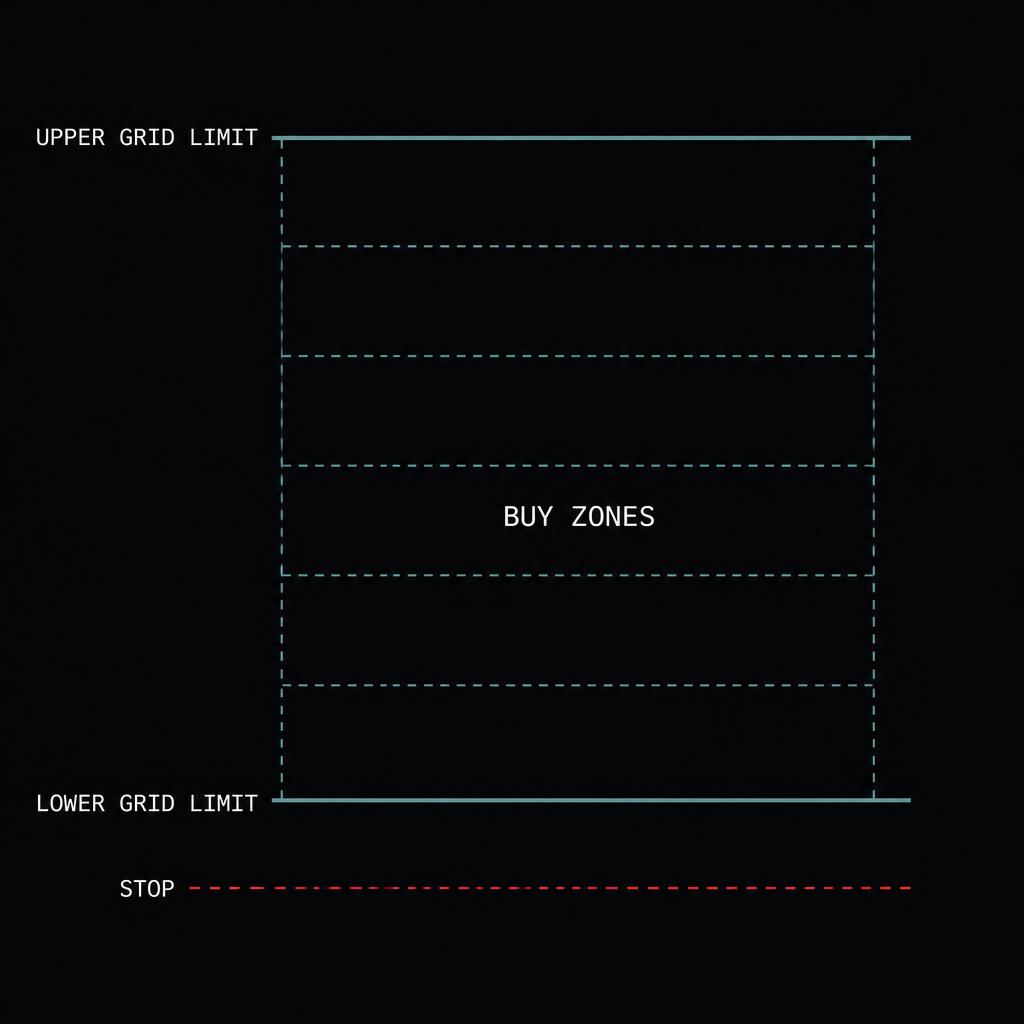
A grid places buy and sell orders at fixed intervals above and below a central price. As the asset oscillates within the range, buys fill on the way down and sells fill on the way up. Each completed pair, one buy, one sell, generates a small profit.
The strategy doesn't predict direction. It bets on continued movement within a bounded range.
That's the key insight. And it's also the constraint. The moment the asset stops ranging and starts trending, the foundational assumption is broken.
When It Works
Three conditions have to be present. All three.
The asset is ranging, not trending. Price is moving sideways within a defined support and resistance band. No clear directional bias. The asset has been consolidating, weeks or months, not days.
Volatility is moderate. Enough movement to trigger orders on both sides of the grid. Too little and the orders don't fill. Too much, a news spike, an earnings event, a macro shock, and the grid gets overwhelmed in one direction before the opposing trades can offset it.
The boundaries are defined by price history, not assumption. Support and resistance levels need to be earned, at least two prior touches, ideally more. Not "the price looks stuck here." Price history or nothing.
If all three conditions are present, the strategy has an edge. If any one is absent, reconsider.
When It Fails
The asset breaks out of the range. One side of the grid fills completely. The other side never triggers. What started as a neutral, systematic approach becomes a large directional position that wasn't planned.
The fix is a hard stop at the grid boundary. If price closes decisively outside the range, exit all positions. The setup is invalidated. There is no "it'll come back."
The intervals are too small. Small intervals mean more trades, more transaction costs, and more exposure to noise. Each completed pair has to clear transaction costs by a meaningful margin, or the strategy is running to stand still.
Size grid intervals to at least 1× the 14-day ATR. Smaller than that and you're trading noise, not structure.
No exit defined for the whole strategy. Individual grid pairs have exits built in. The overall strategy doesn't, unless you define one.
This is where most grid traders get caught. The ranging environment ends, the setup no longer makes sense, and there's no rule that says so because nobody wrote one before the first order was placed.
Define it before you start. Usually: a close beyond the grid boundary on meaningful volume, or a break of a key moving average. Whatever your signal, write it down. Then follow it.
The Setup Checklist
Before the first order:
- The asset has been in a clearly defined range for at least 30 days
- Support and resistance are identified by at least 2 prior touches
- Grid intervals are at least 1× 14-day ATR
- Total capital across all grid levels is within position sizing limits
- Stop conditions are written in the Trading Plan before the first order is placed
- Exit conditions for the full strategy are defined in advance
If any item is unchecked, the grid isn't ready.
The Most Important Rule
Grid trading feels passive. You set the orders. The market fills them. Nothing to do.
That feeling is where the risk lives.
The moment you start making discretionary decisions about whether to hold a failing grid a little longer; because you think it'll reverse, because you don't want to take the loss, because you've already committed significant capital and exiting hurts; the systematic advantage is gone.
Now you're guessing with extra steps.
Write the exit before the first order. Then follow it, regardless of what the position looks like when the condition is met.
That's the whole strategy.

The Trading Plan Template at devinmarshall.info/playbook includes fields for grid trading setups. The complete grid trading chapter, with entry, exit, and interval examples, is in The Savvy Investor's Playbook.
Comments
No comments yet. Be the first to share your thoughts.